Break through Cases


Fig 1 - Plain radiograph of right hip showed fracture of head of right femur with posterior dislocation of right hip

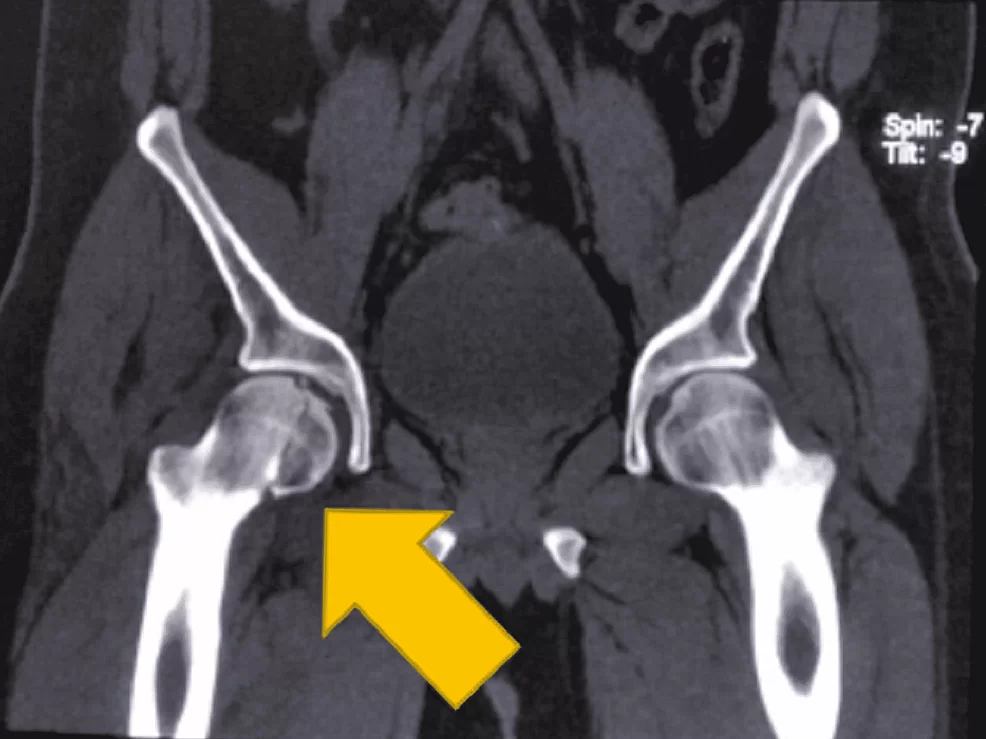
Fig 3 - Coronal CT view showing Pipkin’s type II fracture.
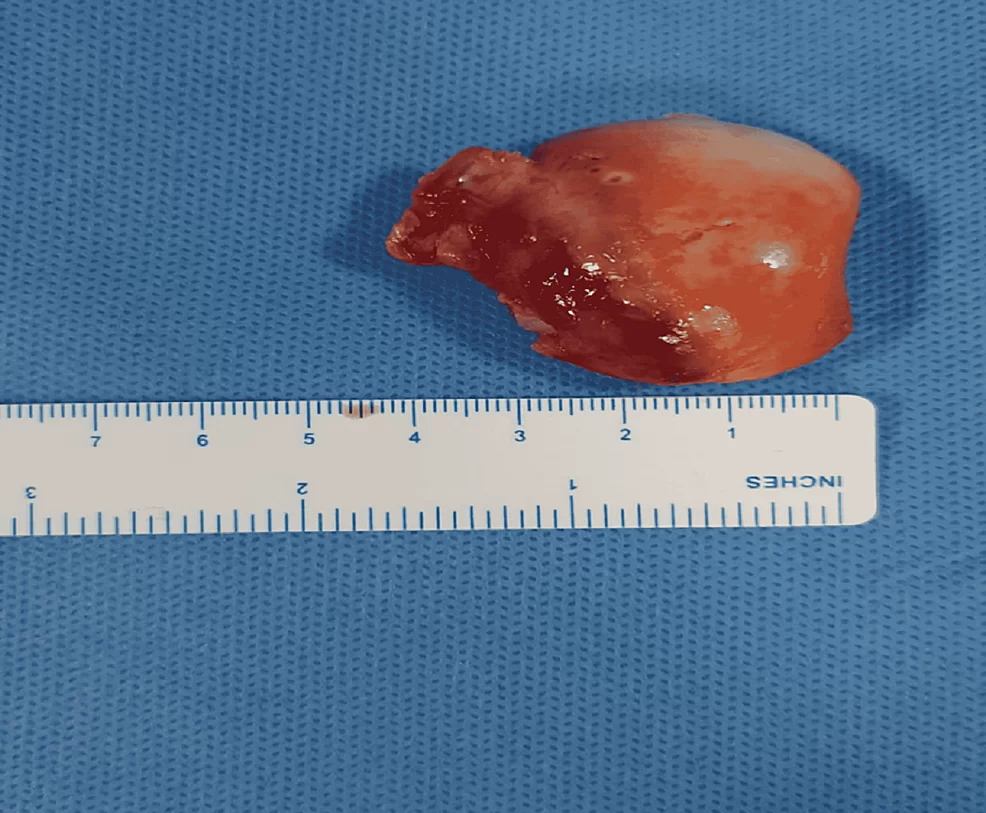
Fig 4 - Femur head fracture fragment.

Fig 5 - Intra-operative image of safe surgical dislocation with Pipkin’s fracture reduced with headless cancellous screw fixation.
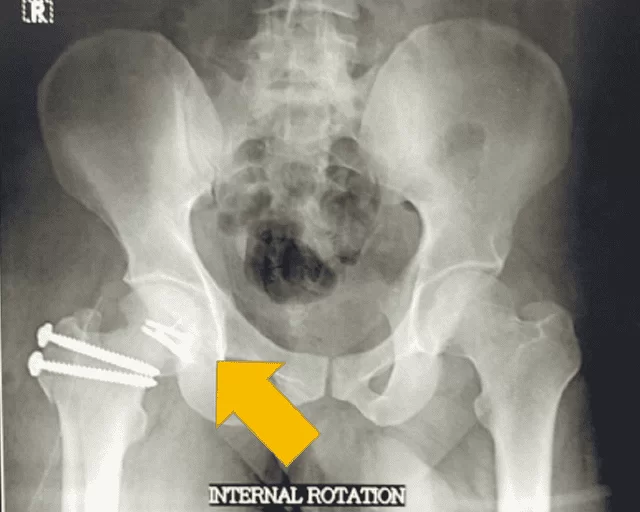
Fig 6 - Three-dimensional reconstruction CT image showing posterior dislocation with Pipkin’s type II fracture.
Fig 7 - External rotation radiograph of pelvis anteroposterior view showing reduced Pipkin’s fracture at six months follow-up.

Fig 1 - Plain radiograph of left elbow (A) antero-posterior view and (B) lateral view showing left supracondylar fracture with gross rotational anterolateral displacement
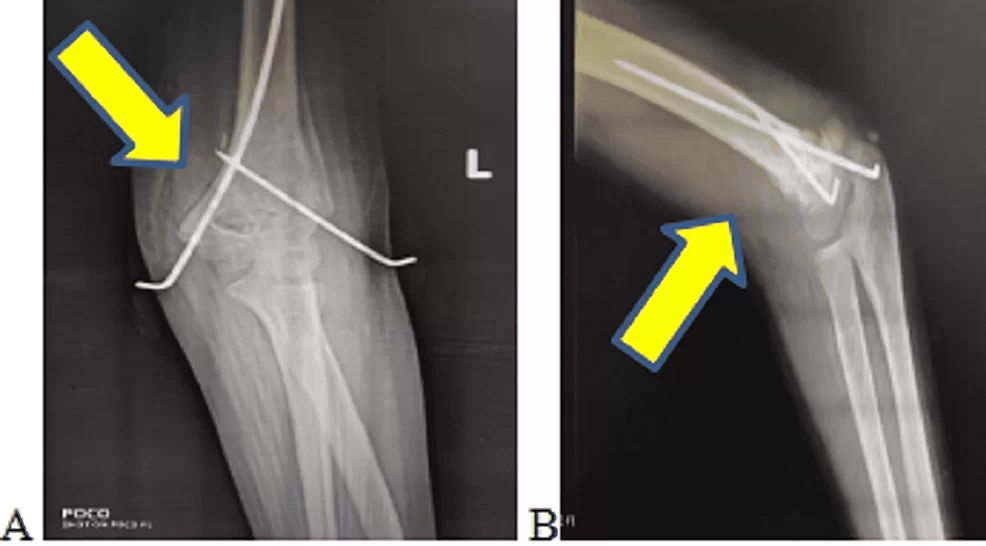
Fig 2 - Plain radiographs of the left elbow (A) antero-posterior view and (B) lateral view showing Kirschner wire fixation for left supracondylar fracture with gross rotational anterolateral displacement
Postoperatively, the patient received intravenous amoxicillin-potassium clavulanate twice daily for seven days, followed by oral amoxicillin-potassium clavulanate twice daily for seven days (dosage was based on the weight of the patient). A postoperative radiograph of the operated elbow joint is shown in Figure
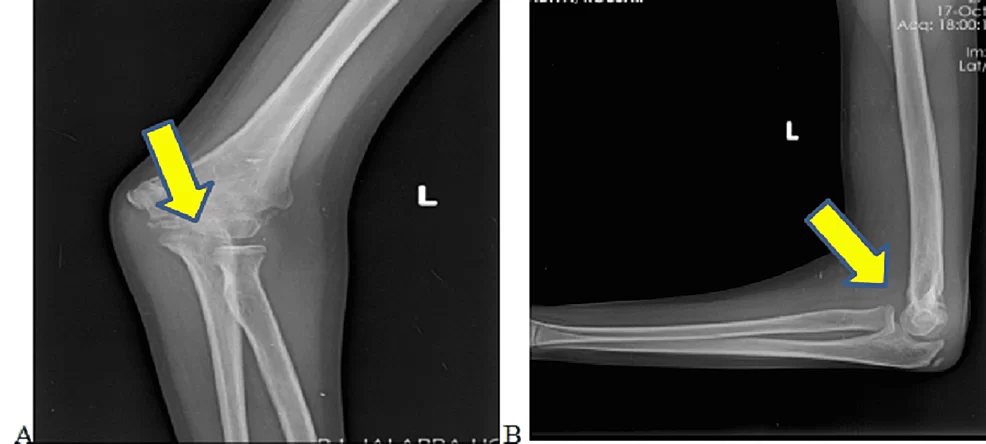
Fig 3 - Plain radiographs of the left elbow (A) antero-posterior and (B) lateral views at three months follow-up
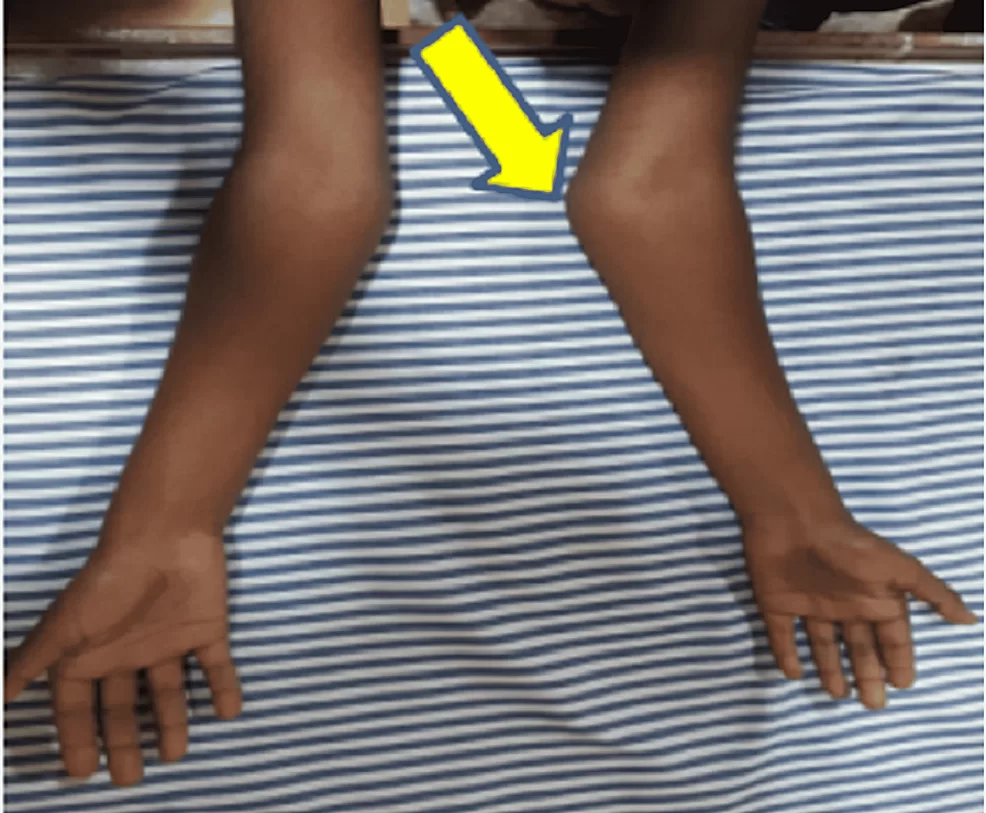
Fig 4 - Bilateral carrying angle more in the left side
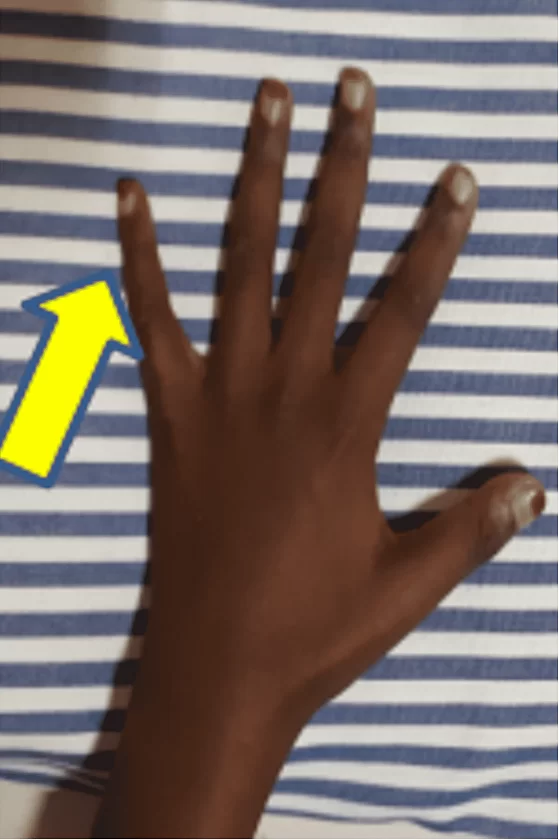
Fig 5 - Ulnar clawing corrected over the left little finger
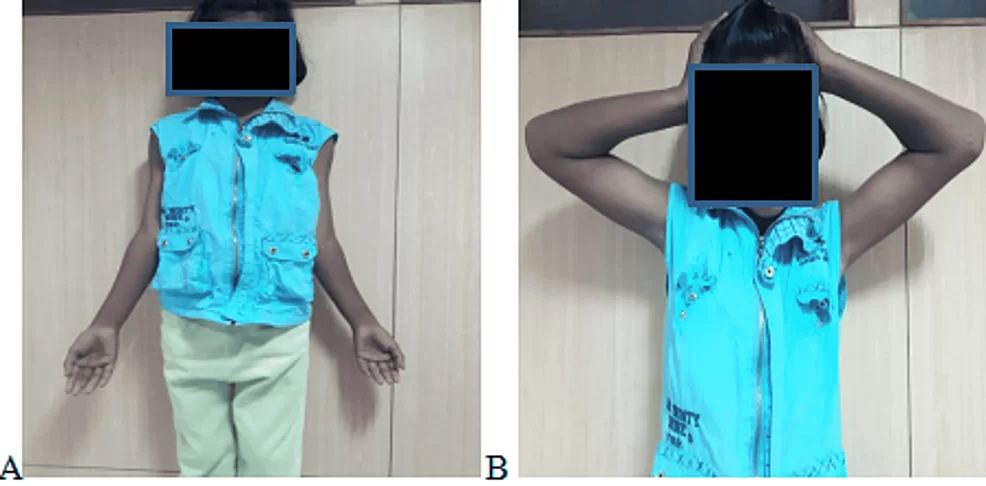
Fig 6 - Clinical picture of (A) elbow extension and (B) elbow flexion showing successful functional range of motion after surgical management.
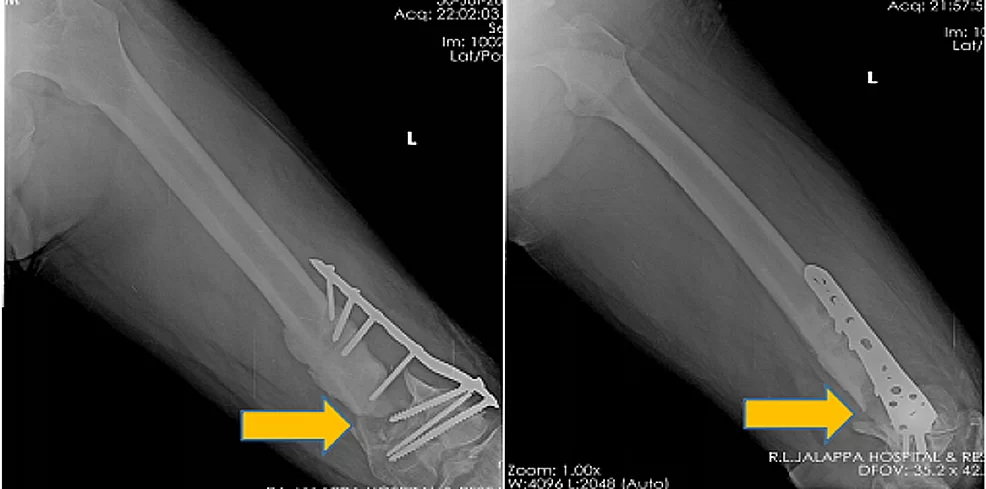
Fig 7 - Plain antero-posterior and lateral left thigh radiograph, indicating non-union of left distal femur with locking compression plate in situ.
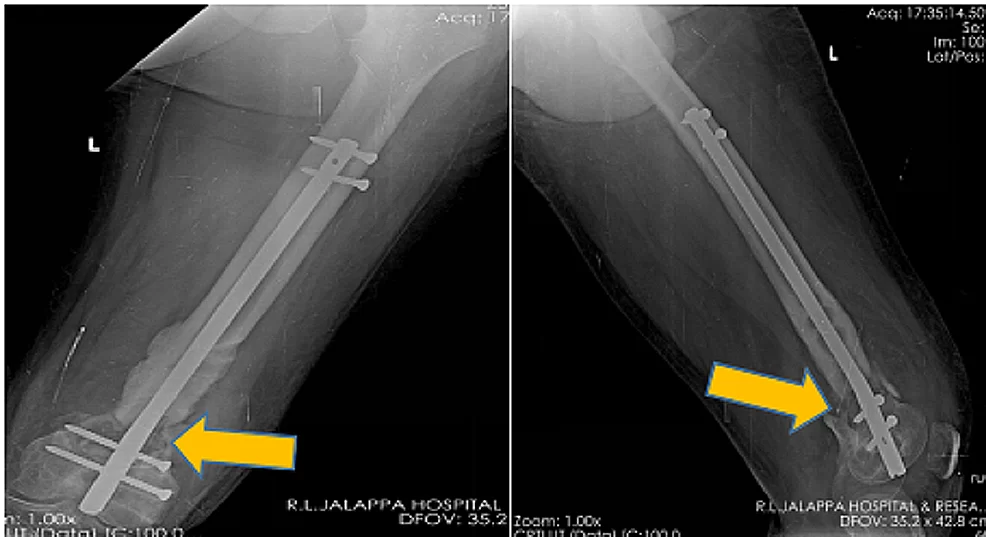
Fig 8 - Post-operative left thigh antero-posterior and lateral view radiograph showing removal of the locking compression plate with distal femoral nail fixation with allogenic bone grafting.
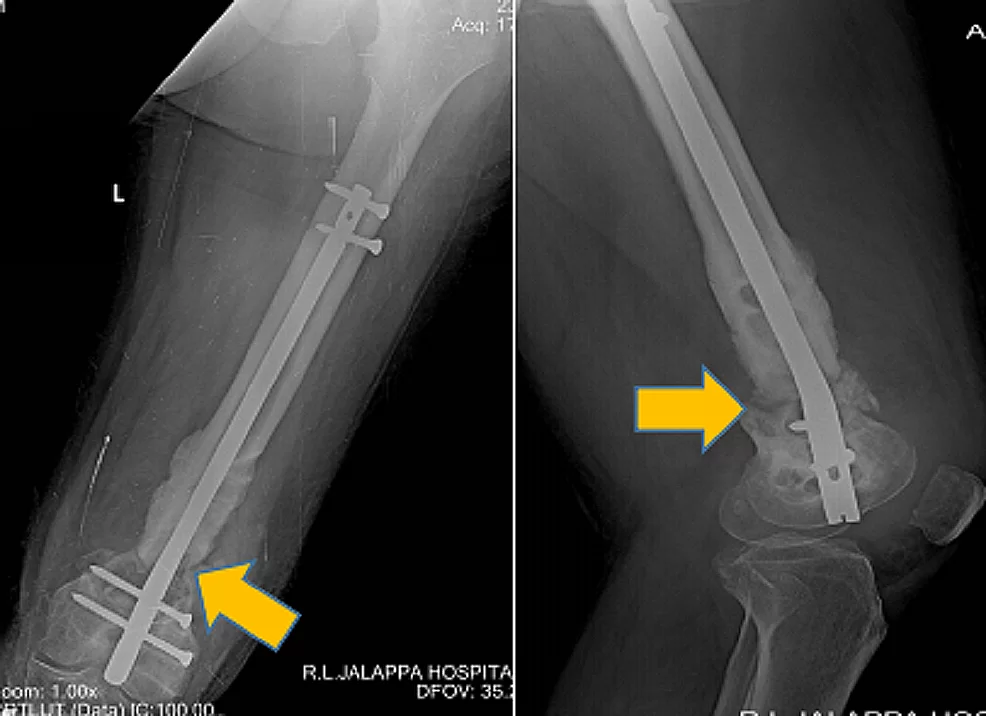
Fig 9 - Six-month post-operative, plain antero-posterior left thigh radiograph and lateral view showing fracture uniting with distal femoral nail in place

Fig 1 - Radiographs of Baby 1 & Baby 2
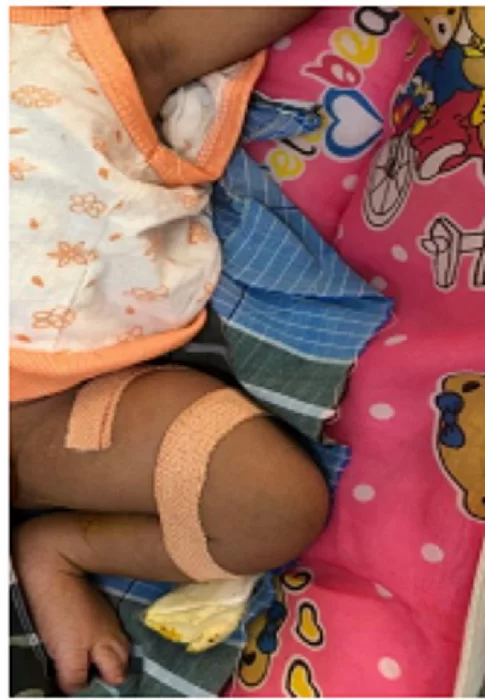
Fig 2 - Strapping Involving Thigh and Leg

Fig 3 - Fracture Unions of Baby 1 & Baby 2
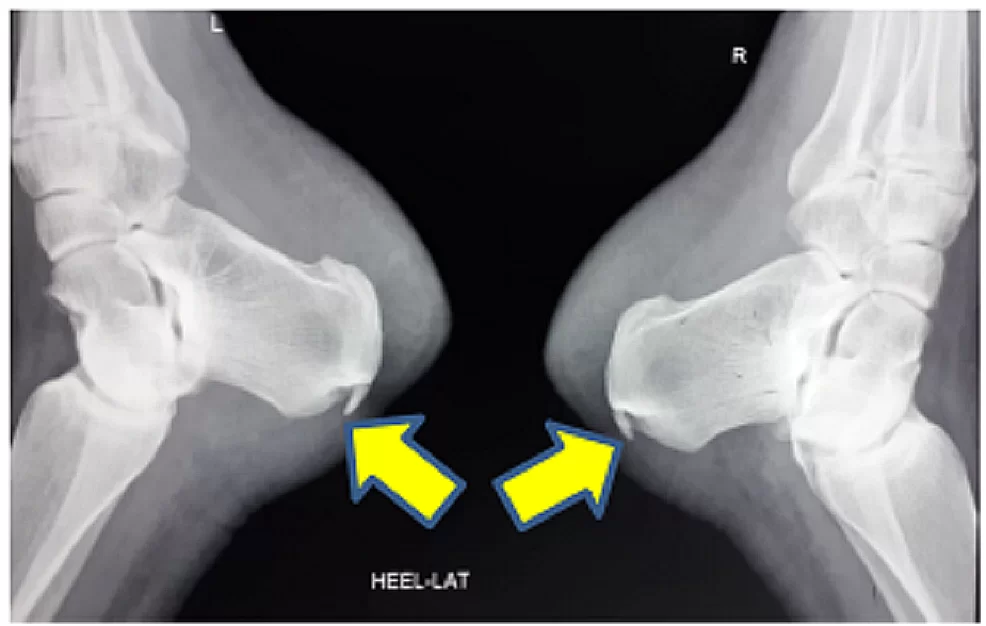
Fig 4 - Lateral ankle radiograph showing bilateral Mulholland deformity

Fig 5 - Postoperative lateral ankle radiograph following surgical excision
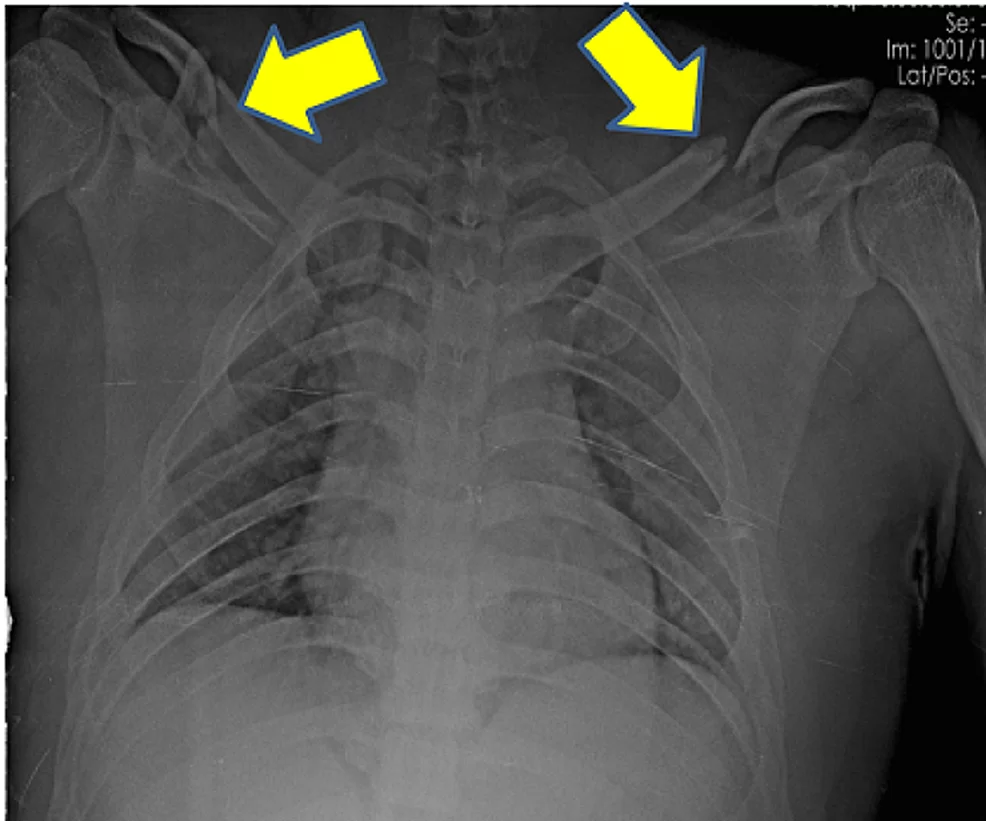
Fig 6 - Plain radiographs of the chest with bilateral shoulder anteroposterior view showing bilateral clavicle fracture
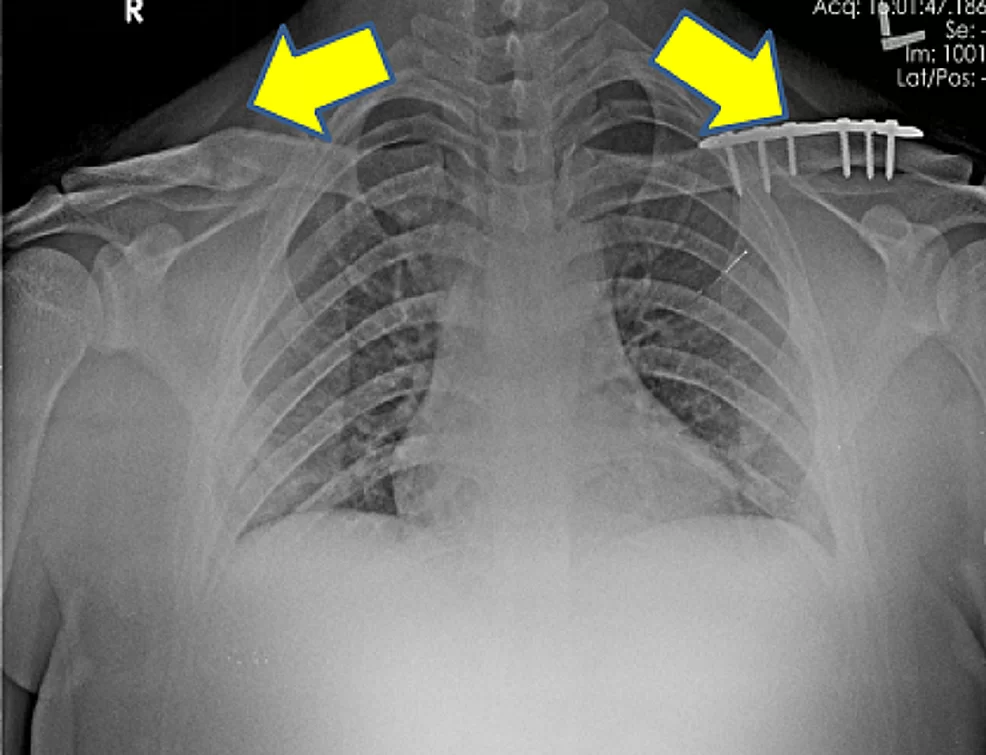
Fig 7 - The plain radiograph of the chest with bilateral shoulder anteroposterior view at six months follow up showing locking compression plate in position for left clavicle fracture and united right clavicle fracture
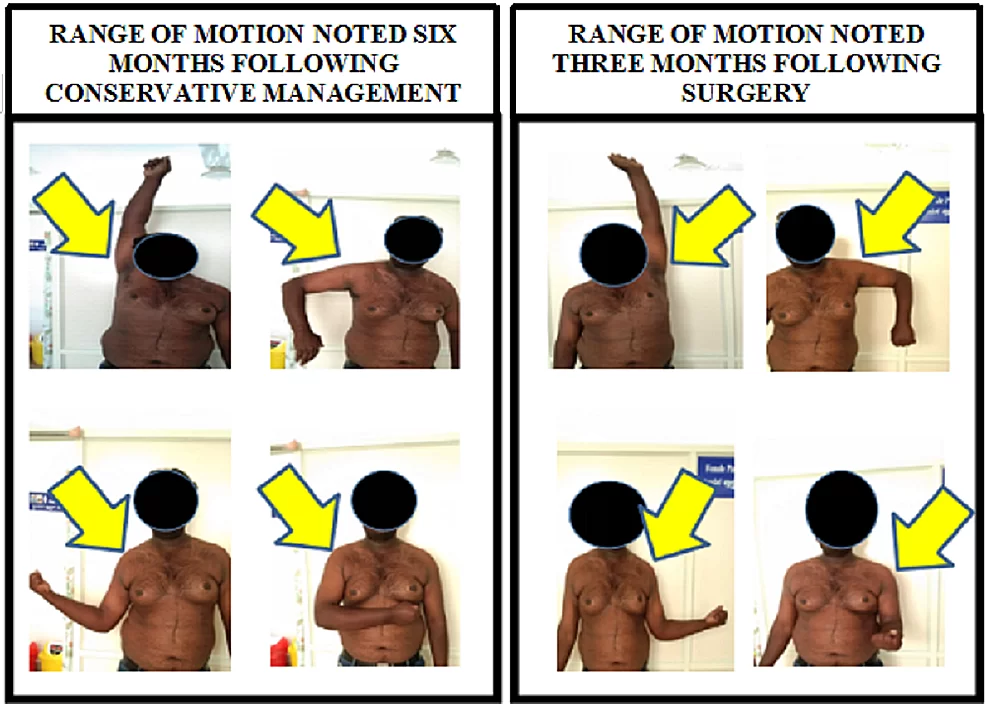
Fig 8 - Clinical picture comparing the range of motion over operative (left) vs. non-operative (right) side
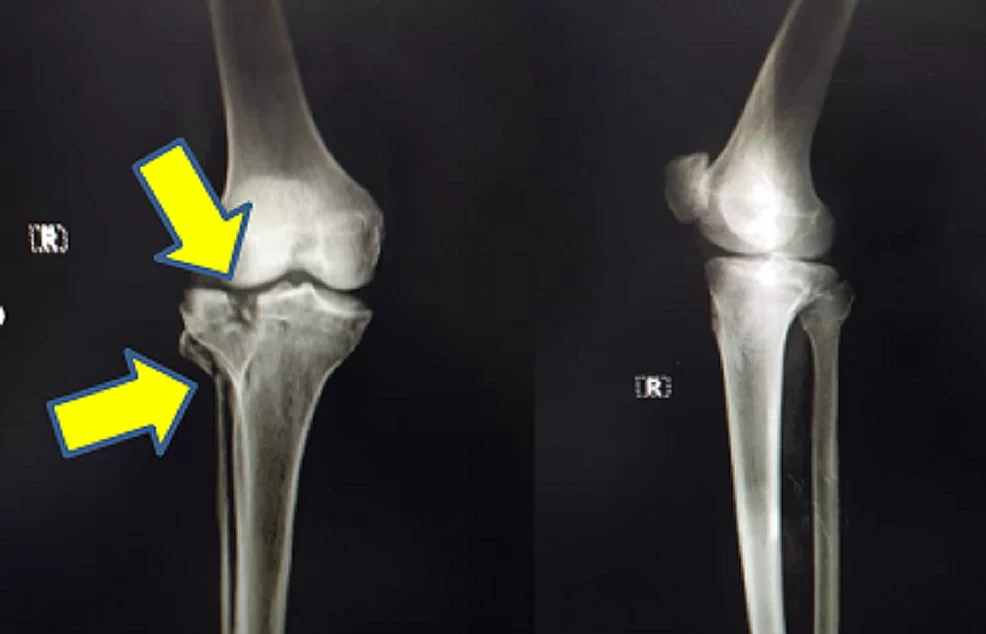
Fig 1 - Plain radiograph (anteroposterior and lateral view) of the right knee showing split fracture involving the lateral tibial condyle, extending into the articular surface, and oblique fracture of the fibular head.
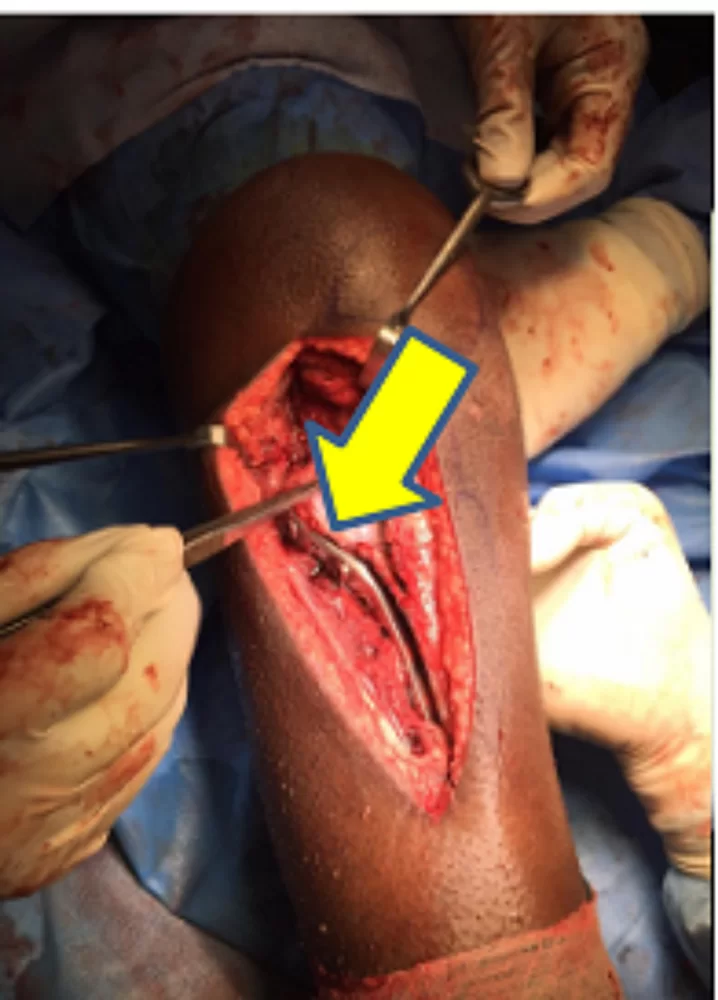
Fig 2 - The plain radiograph of the chest with bilateral shoulder anteroposterior view at six months follow up showing locking compression plate in position for left clavicle fracture and united right clavicle fracture

Fig 3 - Plain radiograph (anteroposterior and lateral view) of the right knee showing reduced split fracture involving the lateral tibial condyle with locking compression plate
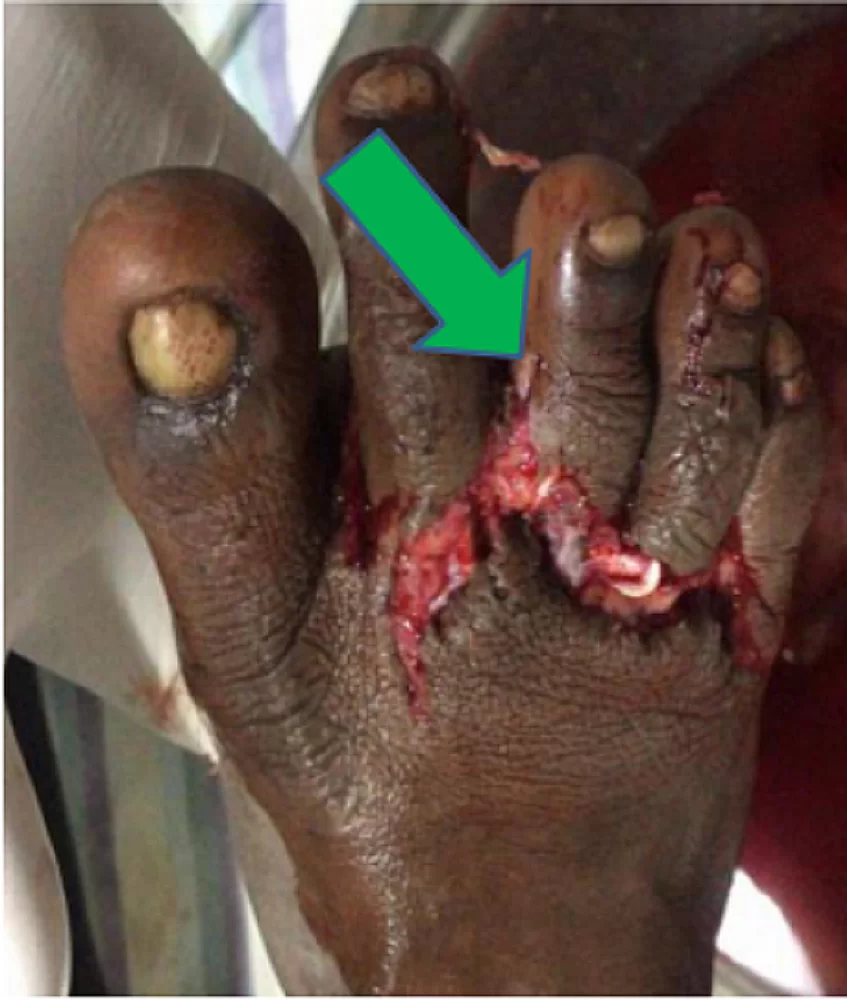
Fig 1 - Clinical picture of the right foot following trauma.
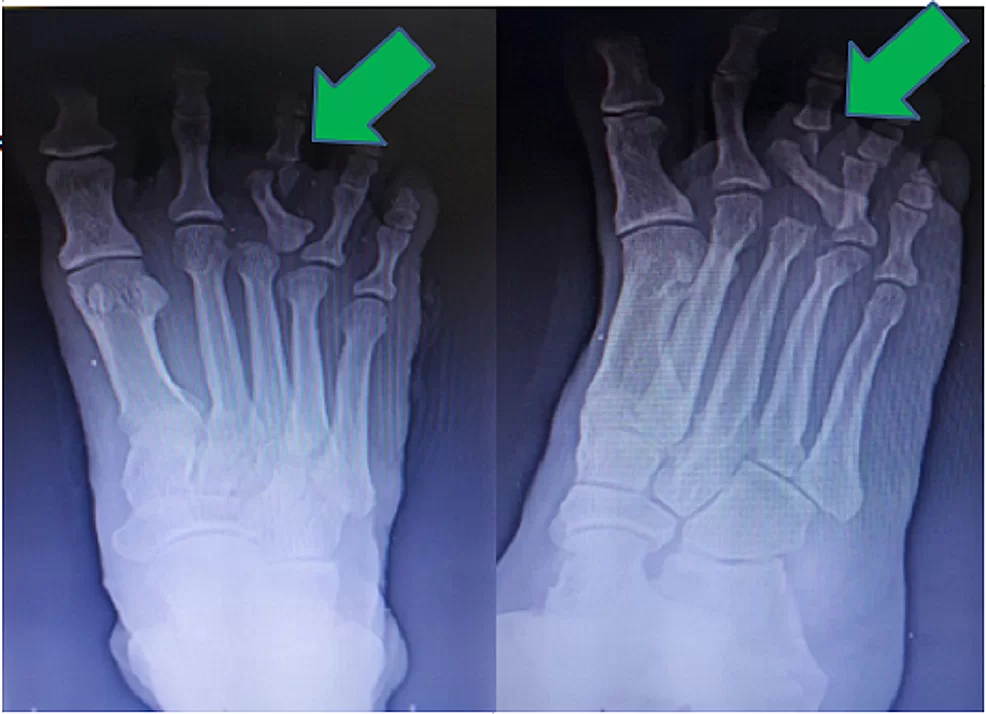
Fig 2 - Plain radiographs of the right foot in anteroposterior and oblique views showing bipolar dislocation of the proximal phalanx of the third toe and neck of the fourth proximal phalanx fracture.

Fig 3 - Failed closed reduction radiographs.
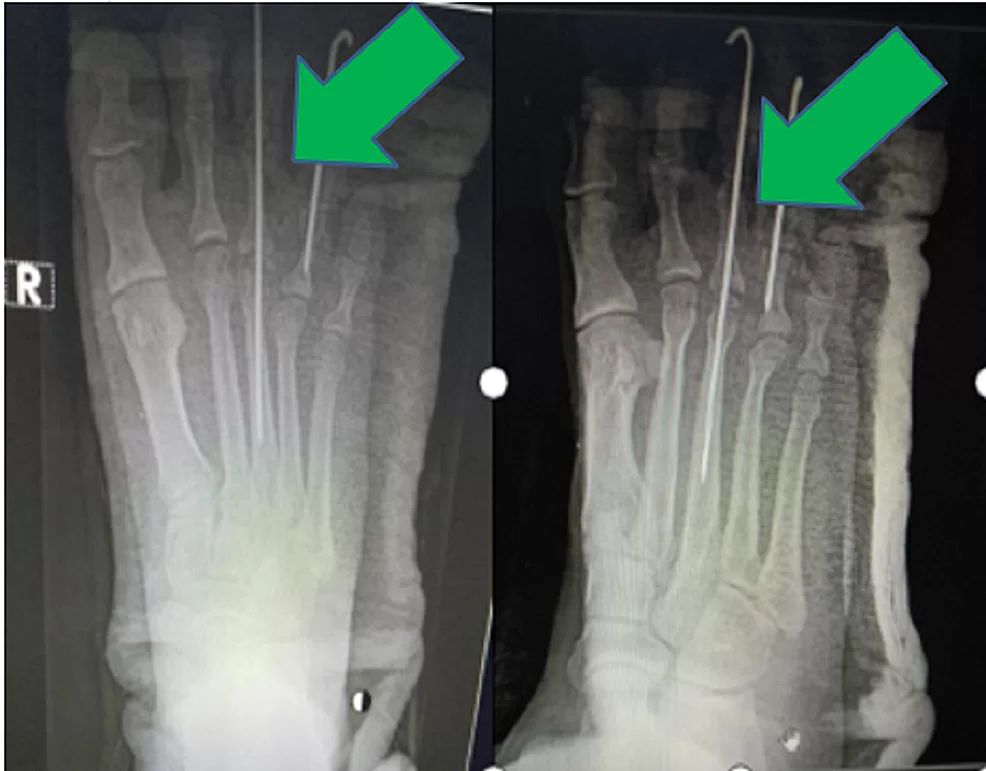
Fig 4 - Post-reduction following open reduction with Kirschner wire fixation. Hospital course